


RHCA436-基于CentOS8pacemaker+corosync 集群部署-ansible部署集群
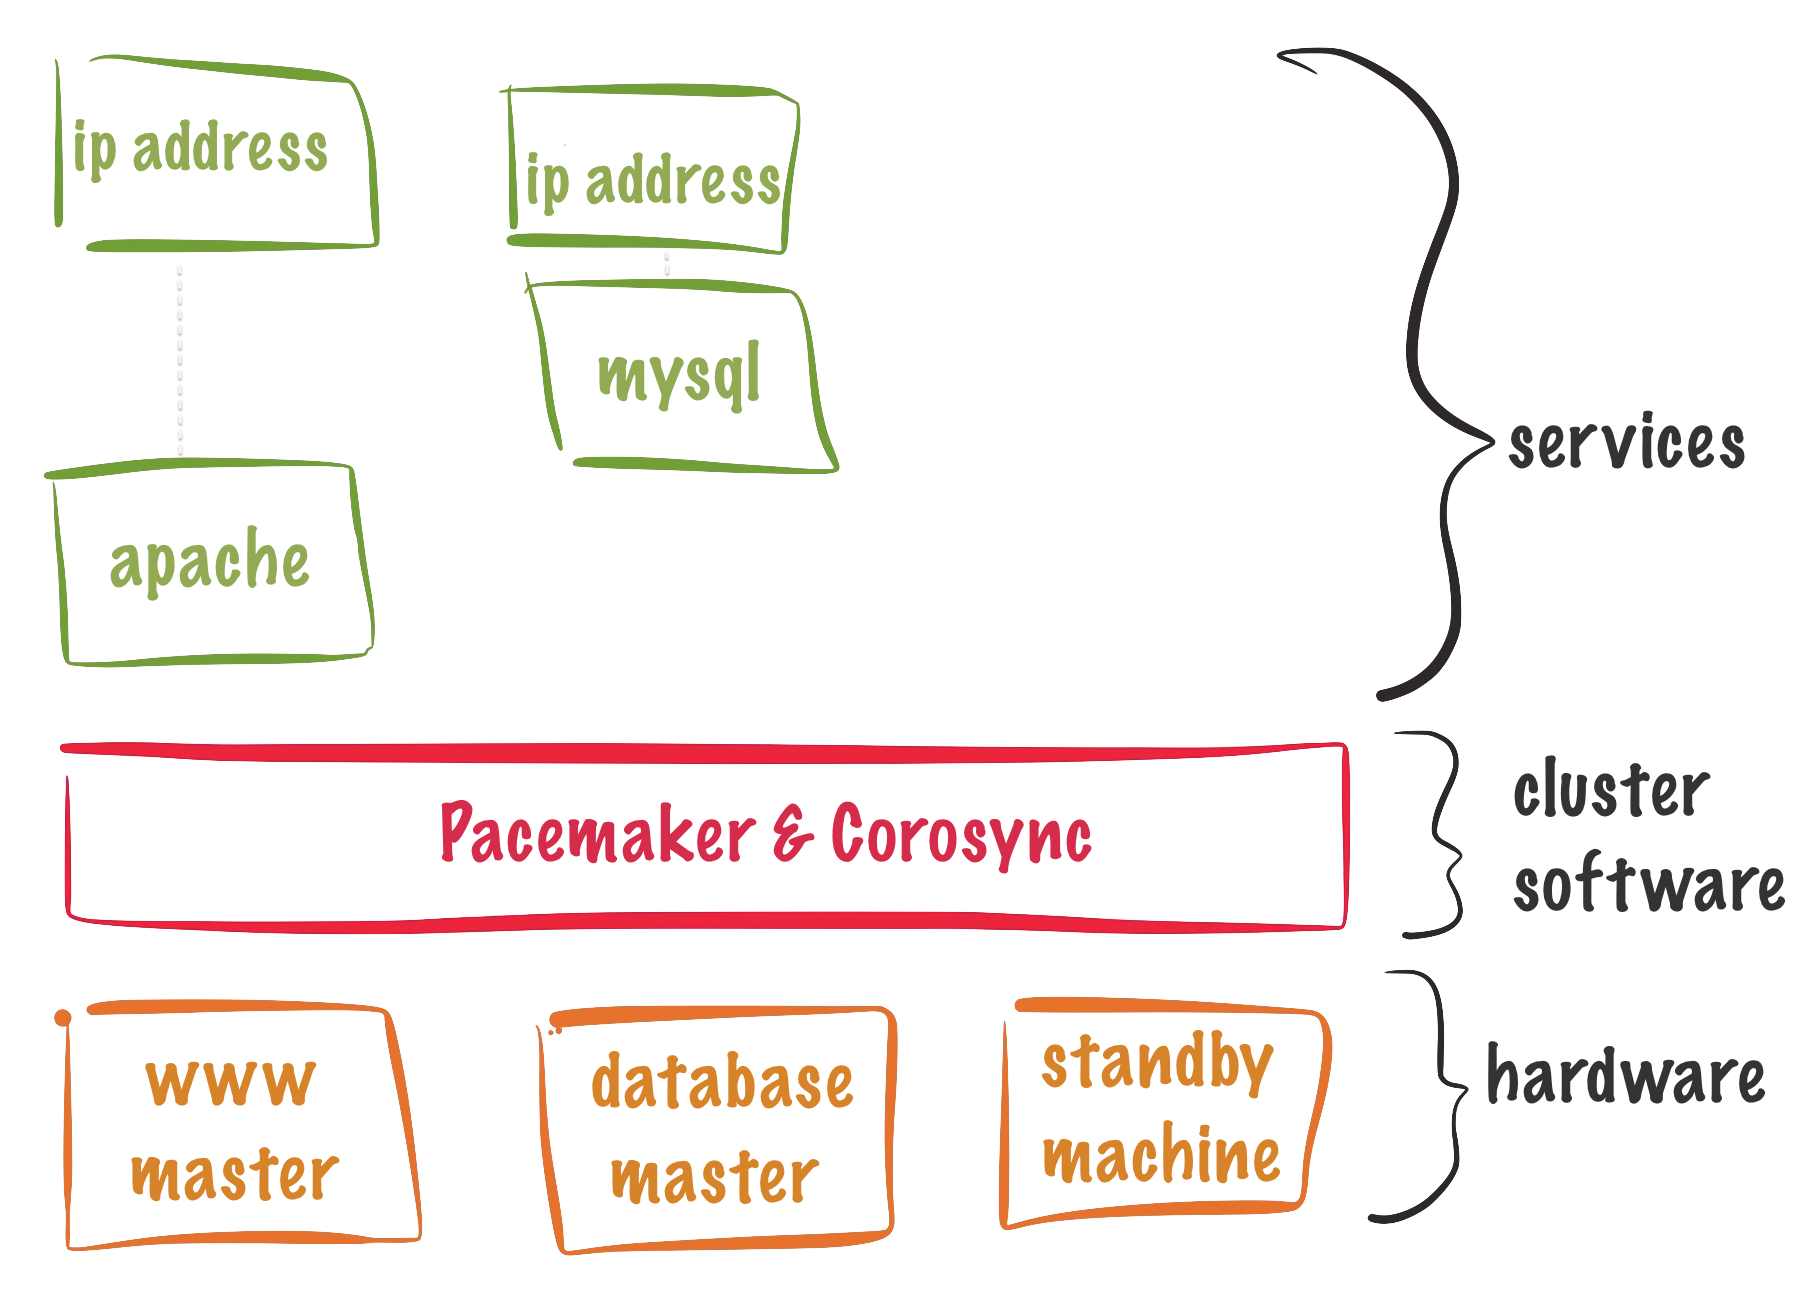
安装部署集群
- 用yum模块安装pcs软件和fence代理软件
- 用firewalld配置防火墙规则
- 用user模块设置hacluster用户的密码
- 用service模块开启pcsd服务,设置开机自启
实验:配置安装集群
1.准备工作
[student@workstation ~]$ lab start auto-ha
2.查看playbook
[student@workstation ~]$ cd labs/auto-ha/
[student@workstation auto-ha]$ cat 01-preparing.yml
---
- name: Preparing the nodes for Red Hat High Availability cluster
  hosts: nodes
  become: yes
  gather_facts: no
  vars_files:
    - passwords.yml

  tasks:
    - name: Ensuring the cluster packages are present
      yum:
        state: present
        name:
          - pcs
          - fence-agents-ipmilan

    - name: Ensuring the required ports are open
      firewalld:
        service: high-availability
        permanent: yes
        state: enabled
        immediate: yes

    - name: Ensuring the password for hacluster is configured
      user:
        name: hacluster
        password: "{{ ha_password | password_hash('sha512') }}"

    - name: Ensuring the pcsd service is started and enabled
      service:
        name: pcsd
        state: started
        enabled: yes
...
3.查看密码文件
[student@workstation auto-ha]$ ansible-vault view passwords.yml
Vault password: redhat
---
ha_password: tbe6W3hz
ipmi_login: admin
ipmi_password: password
4.安装集群前的准备工作
[student@workstation auto-ha]$ ansible-playbook --ask-vault-pass 01-preparing.yml
Vault password: redhat
5.编辑playbook
[student@workstation auto-ha]$ cat 02-deploying.yml
---
- name: Deploying a Red Hat High Availability cluster
  hosts: nodea
  become: yes
  gather_facts: no
  vars_files:
    - passwords.yml
  vars:
    ha_cluster_name: cluster1
    ha_nodes:
      - nodea.private.example.com
      - nodeb.private.example.com
      - nodec.private.example.com

  tasks:
    - name: Ensuring the cluster nodes are authenticated
      command:
        # password of the hacluster user: {{ ha_password }}
        # space-delimited list of nodes: {{ ha_nodes | join(' ') }}
        cmd: "pcs host auth -u hacluster -p {{ ha_password }} {{ ha_nodes | join(' ') }}"
      register: auth_cluster
      changed_when: "'Authorized' in auth_cluster['stdout']"

    - name: Checking the cluster configuration
      stat:
        path: /etc/corosync/corosync.conf
      register: cluster_config

    - name: Ensuring the cluster exists
      command:
        # cluster name: {{ ha_cluster_name }}
        # space-delimited list of nodes: {{ ha_nodes | join(' ') }}
        cmd: "pcs cluster setup {{ ha_cluster_name }} {{ ha_nodes | join(' ') }}"
      register: create_cluster
      changed_when: "'successfully set up' in create_cluster['stdout']"
      when: not cluster_config['stat']['exists'] #判断文件是否存在

    - name: Ensuring the cluster is enabled
      command:
        cmd: pcs cluster enable --all
      register: enable_cluster
      changed_when: "'Cluster Enabled' in enable_cluster['stdout']"

    - name: Ensuring the cluster is started
      command:
        cmd: pcs cluster start --all --request-timeout=180 --wait=180
      register: start_cluster
      changed_when: "'Starting Cluster' in start_cluster['stdout']"
...

说明:
change_when: 当条件成立,则将任务改为change状态
--request-timeout=180: 集群启动超时时间为180s,给予充分的时间启动,集群节点如果180内没有反应,则不再启动
--wait: 等待该命令180s,如果还未完成,则返回错误
6.执行安装
[student@workstation auto-ha]$ ansible-playbook  --ask-vault-pass 02-deploying.yml
Vault password: redhat
7.测试集群已经启动
[root@nodea ~]# pcs status
Cluster name: cluster1
8.配置fence
[student@workstation auto-ha]$ cat 03-stonith.yml
---
- name: Configuring fencing
  hosts: nodea
  become: yes
  gather_facts: no
  vars_files:
    - passwords.yml
  vars:
    stonith_timeout: 180

  tasks:
    - name: Checking if the global STONITH timeout is set
      command:
        cmd: pcs property show stonith-timeout
      register: stonith
      changed_when: false

    - name: Ensuring the global STONITH timeout is set
      command:
        cmd: "pcs property set stonith-timeout={{ stonith_timeout }}s"
      when: "('stonith-timeout: ' + stonith_timeout|string + 's')
            not in stonith['stdout']"
# pcs property set stonith-timeout=180s  设置stonith操作(fence)的超时时间是180s

    - name: Ensuring the STONITH resources exist
      include_tasks: create_ipmi.yml
      loop:
        - id: fence_nodea
          node: nodea.private.example.com
          ip: 192.168.0.101
          # ipmi_login and ipmi_password are defined in the Vault protected
          # passwords.yml file.
          login: "{{ ipmi_login }}"
          password: "{{ ipmi_password }}"
        - id: fence_nodeb
          node: nodeb.private.example.com
          ip: 192.168.0.102
          login: "{{ ipmi_login }}"
          password: "{{ ipmi_password }}"
        - id: fence_nodec
          node: nodec.private.example.com
          ip: 192.168.0.103
          login: "{{ ipmi_login }}"
          password: "{{ ipmi_password }}"
...
[student@workstation auto-ha]$ cat create_ipmi.yml
---
# Task file that creates a fence resource using the fence_ipmilan fencing agent.
#
# Expected variables:
#   stonith_timeout
#   item
#
# The item variable must be a dictionary with the following entries:
#         id: name of the fence resource to create or update
#       node: name of the cluster node
#         ip: IP address of the IPMI over LAN device
#      login: User name for accessing the IPMI over LAN device
#   password: Associated password

- name: Checking if the STONITH resource exists
  command:
    cmd: "pcs stonith config {{ item['id'] }}"
  register: result
  failed_when: false
  changed_when: false

- name: Ensuring the fence resource exists
  command:
    cmd: "pcs stonith create {{ item['id'] }} fence_ipmilan
            pcmk_host_list={{ item['node'] }}
            ip={{ item['ip'] }}
            username={{ item['login'] }}
            password={{ item['password'] }}
            lanplus=1
            power_timeout={{ stonith_timeout }}"
  when: result['rc'] != 0

- name: Ensuring the fence resource is updated
  command:
    cmd: "pcs stonith update {{ item['id'] }}
            pcmk_host_list={{ item['node'] }}
            ip={{ item['ip'] }}
            username={{ item['login'] }}
            password={{ item['password'] }}
            lanplus=1
            power_timeout={{ stonith_timeout }}"
  when: result['rc'] == 0
...

#执行安装
[student@workstation auto-ha]$ ansible-playbook --ask-vault-pass 03-stonith.yml
9.查看集群状态
#查看集群状态
[root@nodea ~]# pcs status
10.清理环境
[student@workstation auto-ha]$ lab finish auto-ha
实验:配置集群资源
1.准备工作
[student@workstation ~]$ lab start auto-res
2.查看playbook
[student@workstation auto-res]$ pwd
/home/student/labs/auto-res
[student@workstation auto-res]$ ls
01-deploy-httpd.yml      03-smoke-test.yml  inventory          solutions
02-create-resources.yml  ansible.cfg        resourcegroup.yml
3.安装httpd服务和放行防火墙和selinux
#安装
[student@workstation auto-res]$ ansible-playbook 01-deploy-httpd.yml
[student@workstation auto-res]$ cat 01-deploy-httpd.yml
---
- name: Deploying Apache HTTP Server on the nodes
  hosts: nodes
  become: yes
  gather_facts: no

  tasks:
   - name: Ensuring the httpd package is installed
     yum:
       name: httpd
       state: present

   - name: Ensuring the required ports are open
     firewalld:
       service: http
       permanent: yes
       state: enabled
       immediate: yes

   - name: Ensuring SELinux allows Apache HTTP Server to access NFS shares
     seboolean:
       name: httpd_use_nfs
       state: yes
       persistent: yes
...
3.创建资源
[student@workstation auto-res]$ ansible-playbook 02-create-resources.yml
[student@workstation auto-res]$ cat 02-create-resources.yml
---
- name: Creating the cluster resources to manage Apache HTTP Server
  hosts: nodes[0]
  become: yes
  gather_facts: no

  tasks:
  - name: Collecting the existing resources
    command:
      cmd: pcs resource config
    changed_when: false
    register: resources

  - name: Ensuring the firstwebfs resource exists
    command:
      cmd: >
        pcs resource create firstwebfs Filesystem
        device=storage.san01.example.com:/srv/www directory=/var/www
        fstype=nfs options=ro --group=firstweb --wait=60
    when: "'firstwebfs' not in resources['stdout']"

  - name: Ensuring the firstwebserver resource exists
    command:
      cmd: pcs resource create firstwebserver apache --group=firstweb --wait=60
    when: "'firstwebserver' not in resources['stdout']"

  - name: Ensuring the firstwebip resource exists
    command:
      cmd: >
         pcs resource create firstwebip IPaddr2
         ip=172.25.250.80 cidr_netmask=24 --group=firstweb --wait=60
    when: "'firstwebip' not in resources['stdout']"
...

说明:
--wait: 等待该命令180s,如果还未完成,则返回错误
4.测试
[student@workstation auto-res]$ curl 172.25.250.80
Hello, world!


